Speechy: Thank you for installing/updating!
See what’s new in the latest version!
Major update:
- OpenAI API response has become much faster (using streaming API)!
❗ Please restart your browser to use Speechy after installation or update. Speechy cannot be used in tabs that were opened before installation or update because of Chrome restrictions.
⚠️ Notice: The APIs used by Speechy are paid services. You will incur costs based on API usage.
Setup
- You need to get your API key for the API provider you choose. Currently, Speechy supports:
- Google Cloud Text-to-Speech API
- Description: This API provides WaveNet (Deep Learning-based high-quality voice synthesis algorithm) voice. Highly recommended!
- Follow the instructions on this link to get your API key.
- For security, we recommend restricting the API key to only the Cloud Text-to-Speech API.
- OpenAI Text-to-Speech API
- Description: This API provides a high-quality voice synthesis algorithm. It’s also good.
- Follow the instructions on this link to get your API key.
- For security, we recommend restricting the API key to only Model capabilities.
- Google Cloud Text-to-Speech API
- Click this extension’s icon on the address bar, choose an API, add the API key, and click save.
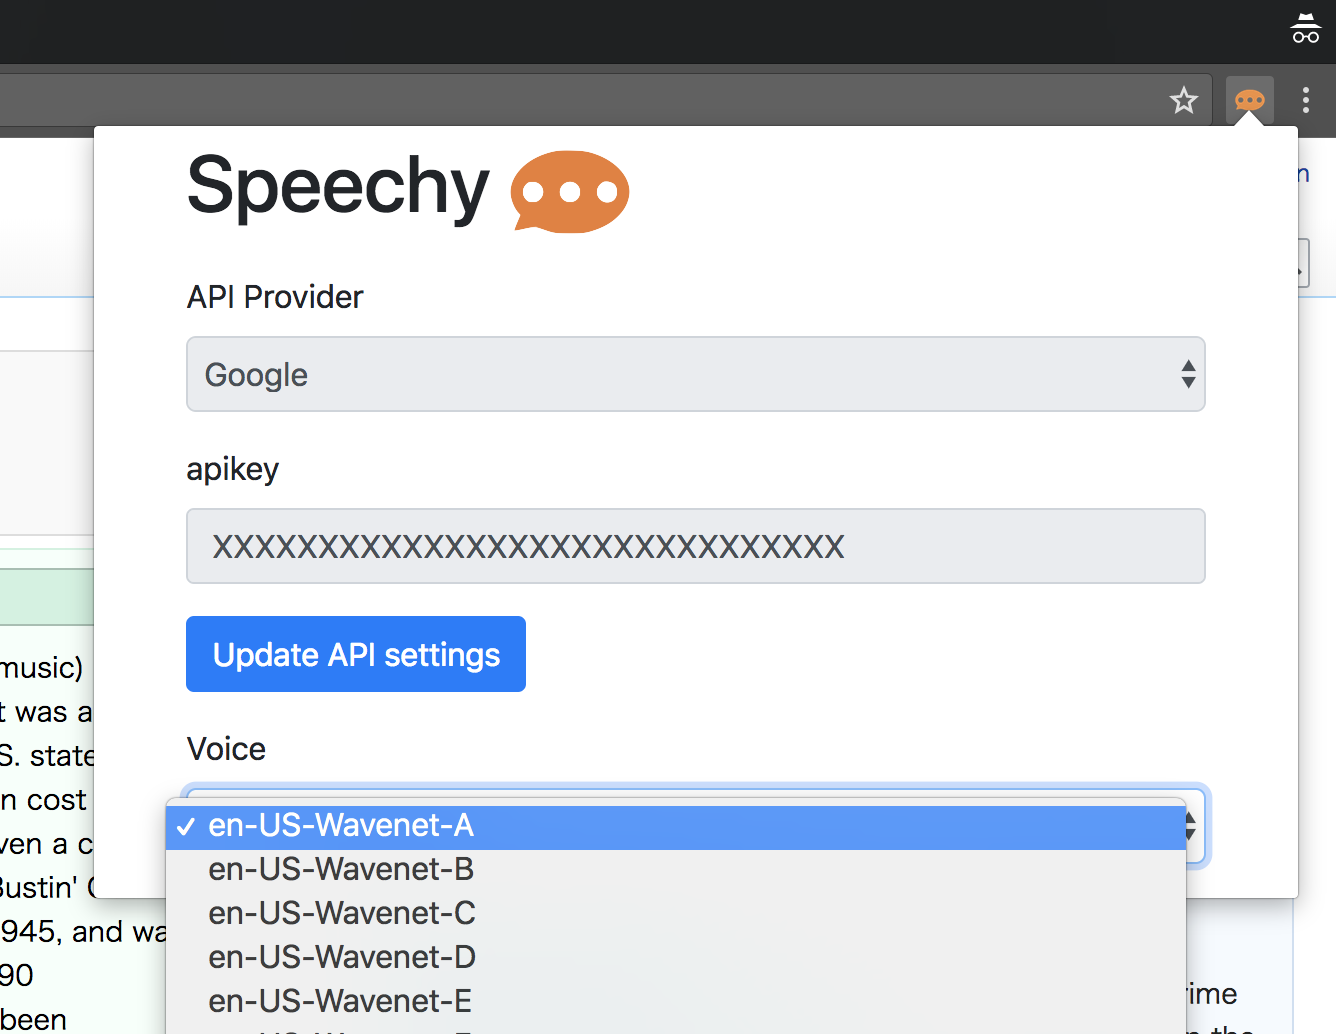
- Choose the voice you like.
- For Google Cloud Text-to-Speech API:
- Choose a voice whose language matches the text.
- For example, en-US-Wavenet-D is for en-US, and the speaker ID is D.
- We recommend using voices named “Wavenet”.
- Choose a voice whose language matches the text.
- For OpenAI Text-to-Speech API:
- All voices are multi-lingual. You don’t need to choose a language.
- However, the quality of the voices for non-English texts is not as advanced. We recommend using the Google Cloud Text-to-Speech API for non-English text if it is available for your language.
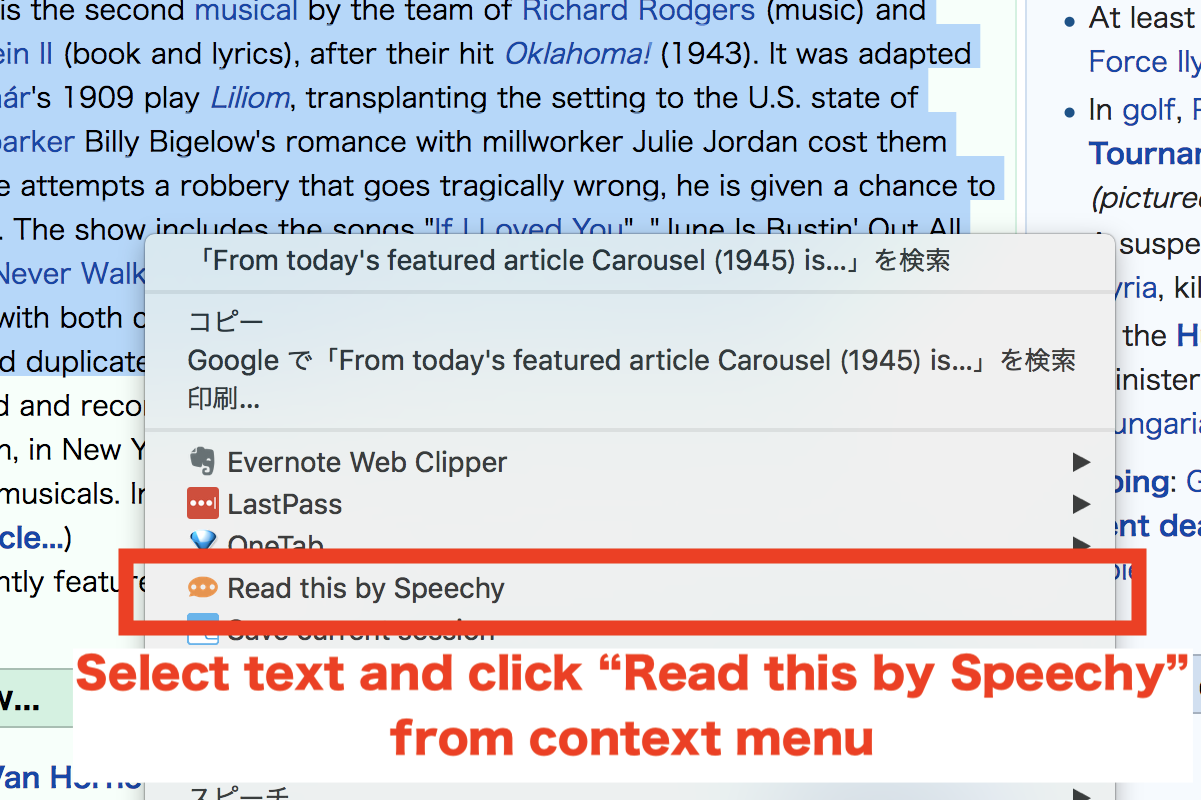
Usage
- Select text.
- Click “Read this with Speechy” from the context menu.
🍭 A keyboard shortcut can be used (default: Ctrl+Shift+1, change it from chrome://extensions/shortcuts)